Showing posts with label sewing. Show all posts

Monday, October 9, 2017

Fabric Organizing & Inventory

Today I'm sharing this inexpensive and effective way I'm organizing my fabric stash.  I have lots of fabric in lots of containers and when I want to use something I usually empty out the entire box to see what I have and then put it all back (or sometimes I don't and the clutter takes on a life of its own!)

So here's what I did:

I cut a one inch or so snippet of every fabric in the container.  Then I sprayed a piece of 8 1/2 x 11 card stock with spray adhesive and stuck them all on. 

 You could also use glue or tape but I liked the spray adhesive because it's tacky. I could peel pieces off and move them around if needed.

*UPDATE* The spray glue does Not stay sticky over time. I've had to go back and re-glue my swatches to the cardstock. Just use Elmer's or other, stronger glue that'll hold up or you'll get this: 

Once I had all of my snippets on the card I slid it into a plastic notebook sleeve and attached it to my container.

Now I can see what I have at a glance.

  Notice the jumbled mess underneath?  I admit I thought about cropping that out. Do you ever see someone's super tidy work space or fully completed organizational project and imagine that they totally have their act together and got it all done in one day? Well, I am definitely not one of those people! I'm just going to work on it a little bit at a time in between other projects. I plan on doing a couple of boxes a week until it's done. 

Monday, October 17, 2016

Black Stash Jacket part 2

I cut the front of the blue blazer using this tutorial.  Then I added navy blue bias tape to the edges.  

I want the jacket to have a military feel to it without copying any actual military uniform. Originally, I was only going to have just these three bars on the front (anyone know the name of this type of embellishment?) 

But I it looked incomplete so I added more bars that diminish in size.

I added royal blue, satin ribbon down the center of each yellow bar so it wouldn't look so blocky, then satin stitched around the raw edges.  This yellow polyester material frays like crazy!  Worse than costume satin!

Then I designed a cuff that echoes the design elements of the yellow and blue bars.  Again, I didn't want to copy any particular military uniform so I avoided using stripes that designate rank. We want this play and its costumes to feel as though children are playing out the story using things they might have found in an attic or grandparents closet or the like.  A kid might find a fancy jacket and think it looks military enough.
 The cuffs are only pinned on because I need the two actors who will be wearing the jacket to try it on.  Two characters wear the jacket: First, Lord Astor, who is captain of a secret mission to find 'star stuff.'  One of the reasons that I didn't want to use British Military style is because his mission is top secret and unofficial so the British Navy would not want it known they're involved.  The second character is Black Stash who steals the jacket from Lord Astor.


*Note, I ended up not using these cuffs.  I'll post a pic of the new ones as soon as I can.


Friday, January 30, 2015

Another Red Coat

This year's production is going to be very exciting!  We are putting on Mary Poppins and it should be a challenge for me.  Already, I have had to alter a pattern.  I sewed a muslin of one of Mary Poppins' coats and then fitted it to the actress playing her.  (With a little direction from my assistant there in the lower right.)
 

A red coat, haven't we seen something like this before?  So far, this coat that she'll be wearing in "Step In Time" is going together without problems.  The trickiest bit was the set in pockets.  The fabric I am using is a poly-cotton gabardine and it has a very nice hand and drapes well.  At least one of Mary's coats is going to have to be fitted specially for a flying harness which will be a totally new thing that I've not done before. 

Monday, April 28, 2014

Bye Bye Birdie, Iconic Story Skirt

 You can't do a play set in the 1950s without someone asking, "Are you going to make Poodle Skirts?" 

I had to do at least ONE poodle!
 Back in the 50s, they were called story skirts or just circle skirts.  Some people will even call every circle skirt that has an appliqued design a poodle skirt whether the design is a poodle or something else. The most famous one is, of course the poodle, originally designed by Juli Lynne Charlot.  The reason that the circle skirt became a huge trend, because you didn't buy them in a store, you made your own!  The only limit on the design was your imagination.*
Each appliqued design is meant to tell a simple story, such as, I took my poodle for a walk.  The stories in the skirts above and below come from the song "Telephone Hour."  The purple skirt on the left features a humming bird, as in, "What's the word, humming bird?"  The orange and black phones are pretty self explanatory.  These two actresses sang across stage to each other, "Hi Nancy!"  "Hi, Alice!"
 
The story in this skirt is from the line, "What's the tale, Nightingale?"  I know that nightingales are not red but I used poetic license.  This skirt was my very favorite.  It looked amazing when the dancer wearing it would twirl; it really seemed like the birds were flying.  The black and white was Pam's idea since we couldn't settle on which color to use.   
  The last skirt I made was the counting sheep skirt.  The story is that it was about 2 a.m., opening night was the next day (or that technically that evening) and I was really tired when I made it!

A circle skirt is an easy project for a beginner, each skirt is 360 degrees around.  (The girls wearing  them loved twirling around.)  In order to make one, you need a square of fabric that is 72" x 72".  The green skirt with the orange phone was made out of a shower curtain that happened to be exactly that size!  We had a huge roll of wide, black elastic for each of the waistbands and pretty much every waistband was put on by Taylor our student crew member.  She had a real knack for pinning and sewing them on!

*It turns out that, just like any trend that becomes wildly popular, circle skirts were eventually sold in stores.  Read more about it here http://thevintagetraveler.wordpress.com/2012/04/23/the-1950s-circle-skirt/ 

Wednesday, March 12, 2014

Sleeve Alterations

 
One of the great things about working in a costume shop is that we have many things in stock to use but they are not all ready to wear.  We're creating costumes for high school students and by nature they are not done growing yet.  The shoulders and torso are smaller for most young men, they fill out as they keep growing, but their arms are long same as an adult's arms would be.  Lanky is the word that comes to mind.  Men's jackets that are longer are also going to be larger in all elements of the jacket.  Men's jackets that are smaller are, conversely, small all the way around, fine for fitting shoulders and torso, but you end up with stubby sleeves.  The easiest alteration to do is to lengthen the sleeve.

This sounds daunting but it's really not.  You start by removing all the buttons, then pick the lining away from the sleeve hem, press out your 'bonus' fabric, re-hem and reattach the buttons.  Time consuming yes, but not difficult.  Plus, you get to see how the garment is made.  The other good news about costumes is that you don't have to be a Saville Row tailor to get the job done either.

Tuesday, March 4, 2014

Conrad's Jacket

So I started this a week ago.This is going to be the gold Elvis-ish jacket that Conrad Birdie wears on the Ed Sullivan show. Since Birdie is supposed to be going into the military the 'feel' of the outfit is supposed to be military in nature.  I'm using a McCall's uniform pattern but I shortened it at the waist to make it more American in style and also because I was running out of fabric.
I was going to do a step by step pictorial of making this coat but then people had my camera, then I forgot it one day and before I could get around to doing in-progress pix of its construction it was pretty much done. All that is left to do is have the actor try it on and then attach the rest of the lining.

We wanted the jacket to have an overstated 'Hollywood' feel so we chose a shiny (but not metallic) yellow-gold stripe.  There are five gold chevrons on the sleeves so he looks Rock-Star important but at the same time does not denote any real rank.  The pockets were added afterwards and they and the collar were trimmed with gold sequined gimp.  I had already started putting in the lining and it was a big pain to sew the pockets on underneath.  I don't recommend it!  Conrad is going to have some gold lame pants that will have a stripe going down each leg made of the jacket fabric.

Friday, February 14, 2014

Fan Club Jacket

Conrad Birdie Fan Club logo design. The font is a modified Giddy Up and the inspiration was basically an Aeropostale hoodie.  I had to print it backwards, trace onto Wonder Under and then carefully cut it out.
The first applique I did onto a knit because it won't fray but it does this annoying curly thing so I scrapped that.


The second applique I did onto blue felt.  The jacket is made from a cream colored polyester gabardine which looks nice but is a huge pain to sew.   It frays as much as costume satin.  There's going to be a little bird added to the jacket but I have to have someone try it on first to see where it'll look good.  The 'fan club' part is stenciled and painted.  I didn't want to applique that part.

Thursday, November 21, 2013

Opening Weekend Craziness!

There's going to be a post-game wrap up complete with pix, I promise!  I've just been too swamped with costuming to blog. 

To date I have made:
Captain Hook:  Fully lined swing coat, vest, 2 pairs lined pants, jabot and repurposed shirt with frilly lace
Mr. Smee (s): 2 coats, 2 hats, 2 pairs pants
Of 6 Mermaids: I made about 4 of their tails, 5 bikini tops, 5 seaweedy hair falls
Mrs. Darling:  Repurposed dress
Like Eleventy-Two pirate and lost boy hats and sashes.'

Plus there's pulling out stock items to build costumes for all the extras which is actually more fun than it sounds AND all of the last minute repairs, details and accessorizing.  Back to work!

Thursday, October 24, 2013

Mermaid - Panne' Problems

As it turns out, the velvet panne' that I used for the mermaid skirt is NOT 4-way stretch.  When I had the actress try it on last night she couldn't get it up past her hips.  I suggested that it was upside down (it could happen) but no.  She didn't like that, understandably.  It was more like wishful thinking that I hadn't spent the day sewing a bunch of sequins (onto a now unusable tail) than lack of confidence in her ability to pull on a skirt. 

When sewing stretch fabrics into a garment that will be skin tight, it's important to test the amount of stretch you have to work with.  Pam had tested one of the other fabrics and I wrongly assumed that this panne' had the same properties.   The other fabrics are 4-way (you can be sure I've now tested them!) and they have six more inches of give than the velvet panne'.  Fortunately there's a lot of the panne' left so I was able to cut another tail adding six inches to the original measurement around the hips.  I had her try it on and it fit fine. 

Wednesday, October 23, 2013

Mermaid with budget sequins

 I started the tail for one of our 6 mermaids this week.  My inspiration was this awesome costume worn by Katy Perry in a hairdryer ad.  When you see a mermaid costume that someone wears to a Halloween party or Trick or Treating it usually has a slit up the back so that the girl can walk.   These mermaids, as I mentioned before, are really just animated set dressing.  They do not speak and they don't really move except to flip their tails so we didn't need to make slits for movement.  This tail starts off with just a slightly inverted tube sewn out of mint green, 4-way stretch Panne'.*  We measured around the actress' ankles and then added two inches around the hips for a very snug fit.

*This measurement was later found to be incorrect, the Panne' is actually a 2-way stretch fabric.

The next step is to make it look scaly.  We didn't want to use all sequins because we don't want the mermaids to distract from what is going on in the scene by being too spangly.  I randomly sewed groups of 3 and four here and there on the tail.  Enough to catch the light but not glitter continously.  
Sequins are expensive! Some of these sequins I already had in my stash.  The silver wheels were given to me by my MIL.  These I sewed on by hand very loosely so that they won't pop off when stretched.  Some, like the holographic one in the center top, are actually big confetti that you get to decorate a party table, cheap but they have no holes. I found some big 1" ones like the ones on the inspiration costume but they were $15 for 3 yards!  Ridiculous. 

Sooo, I swabbed some iridescent polyurethane onto..dun-dun-daaah..a clear file folder and popped out a bunch of circles with my one inch hole punch.  These and the big confetti I sewed on by machine about a 1/4" through the top, not all the way down.  At first my machine had no objection to sewing through the plastic with a medium knit needle, but then it changed its mind (making a huge thread tangle) so I switched to just a regular needle and I put a piece of paper underneath the fabric to stabilize.  So far so good! 
 

Monday, October 14, 2013

Hook's Red Coat is Done!

  Here's the coat with the lining partially in.  We thought that the bottom half was just too much plain red and needed something more.


  I added two more crocodile appliques a bit different from the ones adorning the cuffs.  The lower crocs have clocks in their stomachs while the cuff crocs have Hook's hand in their stomachs. 
This is the coat hanging up; it needs a little steaming.
 And this is me trying the coat on to see how it hangs.  The actors who will be wearing the coat were not available right then.  So it's DONE!  I'm  pretty happy with the whole thing, it certainly is fancy enough for a narcissist like Captain Hook!  I also have solved the dilemma of the pants.  The newer pattern did not fit either actor properly and so I had to cobble together the front part of the first pattern, instead with darts and not that flappy panel, with the back part of the second pattern.  I'll have more on those later.


Friday, October 4, 2013

These Pants Are Weird

I've made even more progress on Hook's coat but  I keep forgetting to bring my camera to costume crew.  I am almost done with it, I just need to fiddle with the lining and then hem it and it should be good to go!   At first I was going to cobble together elements from several different coats but this pattern had all of the elements we wanted so why reinvent the wheel?  I'll have the pix up soon. 
In the meantime, when I'm not at crew, I started on Hook's pants.  These are the pants that are part of  the pattern I'm using:  Simplicity 4923. 
 
 
These are authentic-style pirate pants, but I don't know the name of this particular style.  Anyone know?  They have this placket/button flap front closure that quite frankly looks like a big red diaper.  I had the actor playing Hook try them on last night and they were not flattering, the fit was very odd!

 The Costume Director, Pam, pointed out that for some reenactment clubs (which are abundant around here since we live near Gettysburg) you need to be as authentic as possible in your dress, but there's a reason they don't make pants like this anymore!  Since the top of the pants are not going to be seen anyway, I think I am just going to tailor them to fit the actors around the legs and then do an elastic waistband.

Wednesday, September 25, 2013

More Progress on Hook's Coat


Well this is what it was meant to be.  A stylized paisley-ish  crocodile and hook to adorn the cuff of the coat.


I am really loving my choice of gold satin.  It looks shiny and expensive without being tacky.  Well, as non-tacky as a bright red coat trimmed in fancy gold appliques could be. 

 
A close up of the front of the coat and pockets.

 
It's close to being done!  I have made a lot of progress as of Sunday afternoon.  The lining is finished and waiting to be put in, the cuffs are ready to be attached so I will work on that next costume crew session. 

Sunday, September 22, 2013

Another Piece

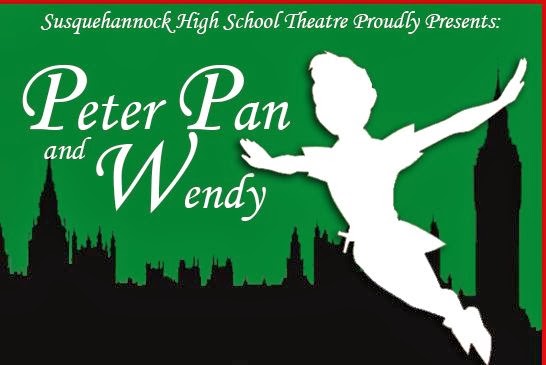
I guess I have not mentioned that the production we're doing is Peter Pan although I did drop some hints.
 

So the fabric chosen for Captain Hook's coat is a red brocade-ish fabric and rather than use gold lame (Hook is supposed to be flashy but he's not Prince Poppycock who I would LOVE to make costumes for!) I chose a heavy gold satin that will be appliqued onto various pieces of the coat.  More to come!

Sunday, June 2, 2013

Forgotten Tutorial - upcycled t-shirt

As I was uploading a bunch of photos to Flickr, I came across a set that I had done of an upcycling tutorial for a girl's fancy t-shirt.  I can't imagine why I never posted it because it came out really cute!  

So I had a few black long sleeve tees that were meant for my boys but were dubbed 'uncool' and a tank top that I'd bought on clearance the summer before that was now too small.


I took the two black tees and cut long strips of fabric to make a ruffle.  I gathered it and pinned it on diagonally.  Un-shown, I did the same with the bottom of the grey tank top and made an under ruffle. and another black ruffle for the hem of the shirt.

Then, using this tutorial from I Sew Do You some costume satin and some cool buttons that were given to me by my MIL, I made some fancy flowers.  I then made another flower out of some of the lacier part of the grey shirt and the black shirt fabrics using this tutorial from Gettin' By.  Both were really easy and quick.  Then I sewed them onto the shirt using cute buttons to fasten them.


 And here is Little Miss looking very fashionable in her new cute top.  She added black polka dot leggings and espadrilles to complete the look. 

Friday, March 29, 2013

Sew What Have I Been Doing?

This week I've been turning an ordinary man's suit jacket into a Hussar's Uniform -- that's the short story.  I've been helping out at my son's high school doing costumes for their rendition of Phantom of the Opera.  It's a lot of hard work but it's also very fun.  This jacket is coming out really cool.  When it is all finished I'll post another pic plus some of the other costumes I've done. 


Cut off th bottom in a military 'V' style.

 
Adding some shiny gold braid.

 
This gold gimp shifted and moved all around no matter how many pins I put in it.  My solution?  Blue painter's tape to hold it still and that worked very well. 


Almost done!  I added gold grosgrain ribbon for the placket and came up with some clever button loops which I then realized were not practical for a fast change during the play.  I'm going to replace them with velcro.  I'm also having about 30 buttons put on the front and I have to finish the chevrons on the front of the sleeve.  If I  have time I'll make a half jacket/cape thing too. 
Related Posts with Thumbnails