In part one of this tutorial, I showed you how to create a basic, no-frills webpage. So now what?
Now, we’re going to perform the amazing feat of getting the page you created from your computer onto the internet so other people can go to it!

1. When your page is just right, it’s time to get it onto your domain. Go onto your Web domain’s Control Panel and find the ‘File Manager’ screen. It may be a little different for every Webhost but somewhere there’s a button or menu option to upload files. Upload the file named Index.html into the main directory. The main directory is usually called ‘root’ or maybe it's always called 'root.' I haven't looked on every Webhost's file management system. If it's not called 'root' on your file manager, look for the top file that contains all the other files.
2. Now, take a look! Open a new window and type the address of your website into the browser. You should be seeing a bunch of white boxes, with x’s in the corner, where your images should be. This is the part of the process that caused me at least a day’s worth of aggravation. In the immortal words of the Beatles: It took me soooooooooo long to find out, but I found out! If this tutorial saves even one person the tooth gnashing and severe frustration I experienced then it will be worth it!
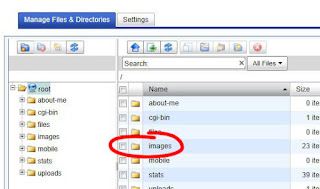
3. “Why are my images not showing up?” you ask. It’s because you haven’t uploaded them yet. Nobody tells you this, it's like a big fat secret, or maybe they assume that you know. I certainly didn't. I found out because I noticed, quite by accident, on another tutorial I was looking up, that there was a file called 'images' in the author's web directory. I made the correct guess that I should have one too. Your File Manager might already have a file named “Images” or it might not. Either way, you need one. If there’s already one there, great. If not, create one right there in the root directory.
4. Now, in the same file location on your computer where your Index.html file was saved there should also be a file named “Images.” When you did the “Save for Web & Devices" action Photoshop very kindly created this file automatically. When you open it, you’ll see your web design but cut up into bits and pieces. Don’t worry, it’s supposed to be like that and your domain server knows how to reassemble them so they look whole again. All you have to do is upload all of those little image pieces and put them into the Images file. There are a couple of ways to do this. If you have an FTP program, it can upload them all at once into the Images File or you can upload them one by one to the root directory (which takes much longer) then move them into the Images File yourself.
5. That’s it, your webpage should be live now! Re-open the window, type the address of your website and you should see your webpage -- Yay!

No comments:
Post a Comment