1. Choose a picture to represent your shop. It can be of you, the products you make or even for whom your product is intended such as a child or pet (preferably wearing one of your products.)
Some things to keep in mind when choosing a picture:
*It's going to be small so you don't want a lot of details that are going to get lost when it's reduced.
*If you are going to put text into your avatar you don't want it to be too busy or it'll be hard to read.
*Make sure it's a nice clear picture. People won't know what you're selling if you have a blurry picture or something that is too vague.
*Your picture should also not be too large--about 5x7 to start off with.
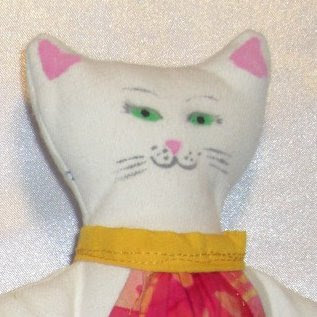 I chose this picture of Alice because she is eyecatching, a product from my store and as a background she's not too busy.
 1. Double click on your photo to open in Microsoft Windows. From the menu bar choose 'file' then 'make a copy.' Save the copy as 'avatar pic' then close. This is VERY important. You don't want to work on your original in case you mess up then accidentally save it-- then your original photo is lost FOREVER. So make a copy before you do anything else.
**UPDATE: Windows 7 users you may have discovered that the old picture viewer is not able to edit photos any longer. You can edit your photos in the new Windows Live Photo Gallery which is pretty much the same as the old picture viewer but with the editing ability. Why did they even bother keeping the old one?
**UPDATE: Windows 7 users you may have discovered that the old picture viewer is not able to edit photos any longer. You can edit your photos in the new Windows Live Photo Gallery which is pretty much the same as the old picture viewer but with the editing ability. Why did they even bother keeping the old one?
2. Now reopen the 'avatar pic' in windows. From the menu bar choose 'fix' then 'crop' from the side menu. Then click the drop down menu under 'proportion' and choose 'square.' You may want to use only a piece of a picture rather than a whole picture reduced to avatar size. Move the cropping box around until you get it the where you like. While people are not intrigued by blurry photos, they are intrigued by snippets of a larger thing so don't worry if some is cut off. Save your picture and close.
3. Now reopen your copy in MSPaint by right clicking on your photo and choosing 'open with MSPaint.'
4. Now you need to reduce your image so that it's about avatar size. Go back up to the menu bar. Choose 'image' then 'resize and skew.' Type in '25' in both boxes (where it says %) Your avatar will now be about the right photo size.

Your avatar needs to be 75x75. Go up to the menu bar, choose 'image' then 'attributes.' In both of the little boxes type 75. Your avatar is now the right size to upload to Etsy.

To add text: Go into the sidebar menu and choose the blue 'A.' Choose the transparent mode at the bottom so that your text appears on top of your picture.  With your mouse, drag a box where you want to put your text.
  To choose your font and its size click 'view' and check off 'text toolbar.' Choose a font that is easy to read, such as Ariel or Times New Roman. Nothing too scripty. Choose a color that will contrast sharply with the background of your picture. You can't go wrong with black or white. Adjust your font size until it fits in the box.
  Now you have a new avatar, go onto Etsy and upload it :)
With your mouse, drag a box where you want to put your text. To choose your font and its size click 'view' and check off 'text toolbar.' Choose a font that is easy to read, such as Ariel or Times New Roman. Nothing too scripty. Choose a color that will contrast sharply with the background of your picture. You can't go wrong with black or white. Adjust your font size until it fits in the box. Now you have a new avatar, go onto Etsy and upload it :)

 I sold 4 drawings! How exciting. Not only because there's money involved, but because it's gratifying to know that people like my work and want to take it home to look at again and again. 2 of my favorite pictures were among those sold. This tree inspired by